Preparation of walls for pasting wallpaper
Preparation of walls for pasting wallpaper
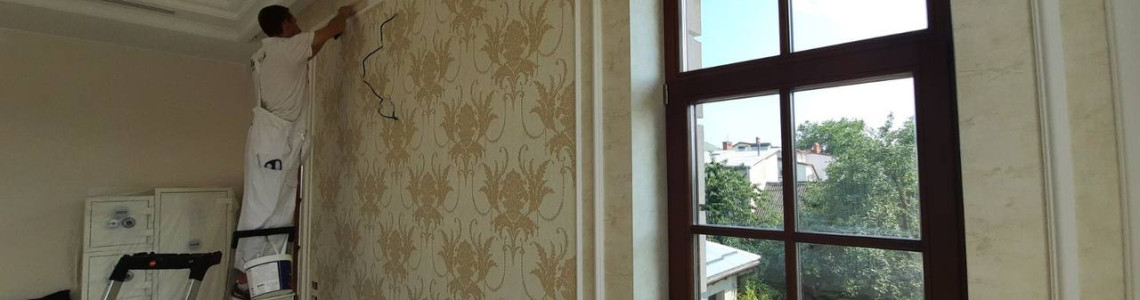
Thorough and competent preparation of the walls for wallpapering is extremely important. Choosing beautiful and high-quality wallpapers for decorating a room, we count on the fact that they will delight us with their beauty and aesthetic appearance for a long time. We take a long time to evaluate, we are interested in the operational qualities of wallpaper, but at the same time we often forget that the base on which the wallpaper will be glued, i.e. the walls, also plays a significant role. What should it be to get the most effective result?
Why is it necessary to prepare the walls for pasting wallpaper?
Preparing the walls for pasting wallpaper is a very important stage, which on the one hand will facilitate the pasting process itself, and on the other hand will extend the service life of the wallpaper. First, the surface of the walls should be as flat as possible. This is especially important if you buy rather thin wallpaper that will not be able to hide even the smallest defects of the base. Moreover, the unevenness of the walls often leads to the fact that in the process of operation, it is in this place that the wallpaper is quickly rubbed or torn. Of course, there are wallpapers that can cover some of the imperfections and unevenness of the walls. They are very dense, and specially created for such purposes. Such wallpaper does not require very careful preparation of the walls, but all other types of wallpaper, be it non-woven, textile, and most vinyl wallpapers do not have such an overlapping ability.
Secondly, the surface of the walls should be dry, clean and thoroughly primed. This will ensure the best adhesion between it and the adhesive layer, which, in turn, will ensure the duration and reliability of wallpaper operation. Thirdly, before gluing them, it is necessary to completely clean the surface of the walls from the old coating.
It is necessary to prepare the walls for wallpaper in the event that there is high humidity in the room. Early fight against mold outbreaks will save you from many problems in the future. Thus, the need for preparatory work before finishing the walls is obvious. As a rule, such preparation includes several stages:
removing old wallpaper;
puttying walls, sealing cracks and potholes, irregularities and other defects;
wall primer for wallpaper.
Tools and materials for preparing walls for wallpapering
In order to start preparing the walls before wallpapering, you will need some tools and materials. The list may change depending on the condition of the walls. Here are some things you will need:
- spatulas of different sizes;
- platen;
- sponge or rag;
- container with warm water;
- wallpaper tiger;
- starting putty;
- finishing putty;
- sandpaper of different grain sizes;
- primer for walls, ordinary or antifungal;
- blower;
- telescopic rod.
We clean the walls from old wallpaper and paint before pasting the wallpaper
Immediately before work, take care to protect the floor from moisture and dirt, for which it is recommended to cover it with a dense polyethylene film. To remove old wallpaper, you will definitely need: "different caliber" spatulas - narrow and wide, a roller, a sponge or a small cloth, a container with warm water or a special liquid.
In the most difficult cases, when it is not possible to remove the wallpaper from the walls even with the help of water, it is recommended to stock up on a knife and a wallpaper tiger - a special roller with needles. You can also use a special liquid that is applied to the walls with a roller, rag or sponge. After a certain time (usually 15-30 minutes), it affects the glue layer, which begins to break down.
How to prepare walls for gluing: primer and putty
We are sure that everyone who was going to glue wallpaper in their home asked themselves the question: how to prepare the walls for wallpapering? This preparation includes 2 main very important steps: putty and primer.
Plastering the walls, sealing cracks and potholes, unevenness and other defects is the next stage of work after removing the old wallpaper. As a result of the work performed at this stage, you should get the most even surface of the walls. Often, for professional puttying of walls, they turn to the appropriate masters. But, if you are confident in your abilities, then why not try to do it yourself. For this, you will have to stock up on the same spatulas of different sizes and putty.
Immediately before applying it, take care to remove fasteners such as nails, dowels, screws, etc. from the walls. After that, he will assess the quality of the surface that will need to be treated. If the number of cracks and chips is not too large, then you can save time and building material by performing putty only on the appropriate areas. However, some experts are quite skeptical about such savings and recommend plastering the walls completely. But the final decision is up to you.
Let's move on to the putty process itself. It should be taken into account that when applying it, you will not be able to avoid noticeable stripes from the spatula. However, it is quite possible to reduce the degree of their bumpiness if you apply two thin layers of the composition - one in the horizontal direction, and the other - in the vertical direction. Diagonal movements can be an alternative. Do not forget about the corner spatula, which allows you to easily apply the leveling composition in the corners of the room.
After the applied layer dries, you can begin to sand it. This can be done with sandpaper. In addition, you need to take care of the further removal of dust. Be sure to use a respirator when sanding!
As soon as the composition dries a second time, we apply a layer of finishing putty, the main purpose of which is to smooth out even the smallest irregularities. After that, you will have to go over the surface of the wall again with fine-grained sandpaper. When all stages of puttying are finished, you can start priming the walls.
Wall putty for wallpaper.
Primer walls for wallpaper. Special attention should be paid to the application of a primer under new wallpaper. The modern market of building materials offers the consumer a fairly wide range of various primers for walls. It is customary to distinguish several main groups of this composition, each of which differs in a number of features and operational properties.
They include primers: acrylic (for processing concrete, brick and wooden surfaces, as well as fiberboard and chipboard), alkyd (for processing only wooden surfaces), mineral (for concrete or brick walls), deep penetration ( if necessary, in additional strengthening of the walls, to prevent the appearance and reproduction of mold and various fungi), with coloring pigments (can have one or another shade, white primers are especially relevant, which are ideal for preparing walls for gluing thin colored or white wallpaper).
Applying soil to the surface of the walls is a very simple task and does not present any difficulties. For work, you can use a brush, a wide roller or a sprayer. A telescopic rod, to the end of which a brush or roller is attached, will be appropriate in this arsenal. This allows you to avoid frequent movements of the ladder and provides access to hard-to-reach corners of the room, which significantly saves work time. The primer can be purchased already diluted or dry (it is recommended to carefully study the instructions with recommendations for its dilution).
If the treated walls are strong and reliable, then you can get by with one thin layer of primer. But when the walls are prone to crumbling or do not absorb the composition well, it is recommended to apply a second layer, but only after the first layer has completely dried.
Primer walls for wallpaper.
Now you are ready for the expected step - wallpapering awaits you! As we have seen, preparing walls for wallpaper is a rather time-consuming task, but knowledge of a number of nuances and recommendations of specialists makes it significantly easier. Of course, if you want to achieve the best result quickly, you can turn to proven masters.
More articles





People Also Bought